
Apr. 20, 2023
How to deploy a Dockerized Django application to Google Cloud Run
Web Development
I write this guide because I am dumb.
Despite the many existing tutorials and resources out there that detail the process of deploying Django projects, I frequently found myself confused and frustrated when trying to follow along. If I managed to complete a tutorial and successfully get a deployment to work, it was often because my project was filled with borrowed configuration code that I did not understand. It was shaky ground, and when something inevitably went wrong, it was almost always because something in that borrowed configuration needed to change and I didn't know how to do it.
I also could not find a tutorial that fit my desired development/deployment scenario exactly. I wanted to be able to:
- Develop locally on an Apple M1 machine
- Dockerize my Django application and a local Postgres database
- Configure the Dockerized application for deployment on Google's Cloud Run service
- Be able to toggle my local development settings to connect to either the local database or the production database
- Sleep well at night
I'm happy to say that I eventually accomplished these goals, and I'd like to share how I got there. In figuring out a solution that worked for me, I leaned heavily on the following documentation and tutorials that each tackle different aspects of the puzzle:
- Google's official Running Django on the Cloud Run environment
- Michael Herman's Dockerizing Django with Postgres, Gunicorn and Nginx
- Very Academy's Django and Docker Compose YouTube video
- Logan Hennessey's Running Django on Google Cloud Run
- Katie McLaughlin's Advanced Deployment interview on the Django Chat podcast — this was particularly motivating when I wanted to quit!
So if like me you are relatively new to Docker, and the process of slightly advanced Django deployment, I hope this guide helps you to get your project live, and to have a codebase that you yourself understand.
Best of luck!
Dockerize a new Django project
Create a new empty directory on your computer to serve as the home base for the project. I am calling this folder your_app_root_folder.
In that directory make a new file called Dockerfile (no extension) with the following Python configuration:
# pull official base image
FROM python:3.8.13-bullseye

# set work directory
WORKDIR /usr/src/your_app_root_folder

# set environment variables
ENV PYTHONUNBUFFERED=1
This will create a Docker container for the Python code. It's where the Django project will live. A few notes about the code:
That base image of Python (3.8.13-bullseye) comes form the Docker Hub official Python image repository. That version I found plays nicely with the Apple M1 and a specific version of the psycopg2 Python package that is needed to connect Django to a Postgres database.
This line:
WORKDIR /usr/src/your_app_root_folder
…establishes the folder path inside of the container that will contain the project. It doesn't refer to the folder path on your local computer. It's the folder path in the container's Linux OS where the local project will be copied to.
Again, when Docker runs a project, it's running the files that have been copied inside of the container.

With the container ready, create a new Django application in the project folder using a temporary virtual environment. In the terminal navigate to the project directory and follow these steps:
python3.9 -m venv env
source env/bin/activate
pip install Django==4.1.5

django-admin startproject new_app . # change new_app name if desired
python manage.py migrate
A fresh Django application called new_app is now in the project directory. Test it by running python manage.py runserver and then navigating to http://127.0.0.1:8000/ in the browser.
Delete the /env virtual environment — it's not needed anymore.
To manage Django's Python packages, create a new file called requirements.txt in your project directory. Open it and add:
django===4.1.5
Save and quit. The project directory should look like:
└── project_root_folder
    ├── new_app
    │   ├── __init__.py
    │   ├── asgi.py
    │   ├── settings.py
    │   ├── urls.py
    │   └── wsgi.py
    ├── Dockerfile
    ├── manage.py
    └── requirements.txt
Now that the bare-bones Django files exist, add them to the Dockerfile.
# pull official base image
FROM python:3.8.13-bullseye

# set work directory
WORKDIR /usr/src/your_app_root_folder

# set environment variables
ENV PYTHONUNBUFFERED=1

# install dependencies
RUN pip install --upgrade pip
COPY requirements.txt ./
RUN pip install -r requirements.txt

# copy project
COPY . .
Configure docker-compose
The Docker project will ultimately have three containers:
- A Python container to house a Django application
- A PostgresSQL container
- A Google CloudSQL proxy container (will explain later)
To manage the building and running of the three different containers, a special Docker command called docker-compose is used. This command requires a .YAML file with instructions about each container.
In the project root, create a file called docker-compose.yaml. Add the basic configuration to build and run the Python container specified in Dockerfile.
version: "3.8"
services:
  web:
    build: .
    container_name: new_app_django
    command: python manage.py runserver 0.0.0.0:8000
    volumes:
      - .:/usr/src/new_app
    ports:
      - "8000:8000"
What are these incantations?
version: "3.8"refers to a specific version of thecomposecommand itself [1]services:describes each container in the project. We've named this first servicedjango, and given the container a name ofnew_app_django. (The service name and the container name are slightly different concepts that will come up later.)command:is the terminal input for when the container is ready. Thisdocker-composecommand is for local development only, so it's safe to use the Djangorunservercommand. Production will get different instructions later.build: .is where Docker looks forDockerfile, and uses those instructions to build this service.volumes:is the container's path to where the project files will persistports:maps the local machine's ports to the container's.
Before running the docker-compose command, it's good to know that a random project name will be generated unless one is declared in a special environment variable.
To do that, create a file in your project root called .env. Add the following:
COMPOSE_PROJECT_NAME=new_app
Then specify this .env file path in docker-compose.yaml like so:
version: "3.8"
services:
  django:
    build: .
    container_name: new_app_django
    env_file:
      - ./.env
    command: python manage.py runserver 0.0.0.0:8000
    volumes:
      - .:/usr/src/new_app
    ports:
      - "8000:8000"
It's now time to build the initial project. If you haven't already, download and install the Docker Desktop application. Make sure to have it running, and that the project's structure looks like this:
└── project_root_folder
    ├── new_app
    │   ├── __init__.py
    │   ├── asgi.py
    │   ├── settings.py
    │   ├── urls.py
    │   └── wsgi.py
    ├── docker-compose.yaml
    ├── Dockerfile
    ├── manage.py
    └── requirements.txt
Navigate to the project root in your terminal and fire away:
docker-compose build django
The above django refers to the service name defined in docker-compose.yaml. If the service was called hamburgers, then you could run:
docker-compose build hamburgers # 🍔
Specifying the to-be-built service name is not required. The docker-compose build command will try to build all services in the .yaml file if none are specified.
The terminal should now be busy downloading the specified Python image from Docker Hub and putting the project together as instructed.
Once the build steps are complete, start the project:
docker-compose up
Docker Desktop should show the new project and container running.

Now navigate to http://127.0.0.1:8000/ in your browser to see the initial Django app running. We're having fun now.

Add the PostgreSQL service
Adding a local database service is slightly easier than adding the initial one. The Python image from Docker Hub needed additional instruction to run Django — download and copy requirements.txt — but the Postgres container requires no additional configuration. The off-the-shelf Postgres image from Docker Hub does the job.
Add to docker-compose.yaml:
version: "3.8"
services:
  django:
    build: .
    container_name: new_app_django
    env_file:
      - ./.env
    command: python manage.py runserver 0.0.0.0:8000
    volumes:
      - .:/usr/src/new_app
    ports:
      - "8000:8000"
    depends_on:
      - pgdb
  pgdb:
    image: postgres:13.3
    container_name: new_app_pgdb
    environment:
      - POSTGRES_DB=postgres
      - POSTGRES_USER=postgres
      - POSTGRES_PASSWORD=postgres
    volumes:
      - ./pgdata:/var/lib/postgresql/data
volumes:
      pgdata:
Incantations
- The new service is called
pgdband the container name isnew_app_pgdb depends_on:says that thedjangoservice needs thepgdbservice to run properlyimage: postgres:13.3is the image that plays best with my Apple M1 and thepython:3.8.13-bullseyebase Python image (YRMV)- Docker Hub's official Postgres image docs specify required
environmentvariables.[2] You could add them to the aforementioned.envfile and plug those variables in here, but because those values I've chosen are so boilerplate, and because this database will only be accessed during local development, I'm hard-coding them. volumes:establishes the Docker volume where the database data will persist. This is a very important step; without it your database will start from scratch each time you rundocker-compose up. The volume itself is calledpgdataand it will be copied to the/var/lib/postgresql/datapath in your container. This exact path important.
You'll notice a second appearance for volumes in the final lines at the same indentation level as services. This is where the project's persistent volumes are defined so that they can be accessed by other containers.
Connect the Django project to the Postgres DB
In your project directory, remove the default db.sqlite3 file generated by Django. That's the simple database that your project will try to connect to by default.
Open new_app.settings.py and scroll to the DATABASES section.
Replace this section…
DATABASES = {
    'default': {
        'ENGINE': 'django.db.backends.sqlite3',
        'NAME': BASE_DIR / 'db.sqlite3',
    }
}
…with:
# Local, Postgres DB.
DATABASES = {
    'default': {
        'ENGINE': 'django.db.backends.postgresql',
        'NAME': 'postgres',
        'USER': 'postgres',
        'PASSWORD': 'postgres',
        'HOST': 'pgdb',
        'PORT': 5432,
    }
}
'HOST': 'pgdb' is a reference to the named service that the Django project will connect to. In non-Dockerized apps, this is where you would put a connecting address like 127.0.0.1.
Open requirements.txt and add the psycopg2 Python package:
Django==4.1.5
psycopg2==2.9.3
Rebuild and restart the project. Like before, you can use:
docker-compose build django
Because the django service now depends on the pgdb service, Docker will build both. Start the project after the build finishes.
docker-compose up
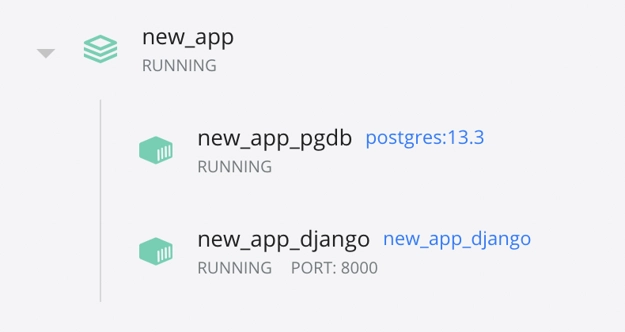
You'll now see two containers represented in Docker Desktop.
Note: It's possible to get an error here that comes from the Django project initializing before Postgres. The error would look something like:
django.db.utils.OperationalError could not connect to server…
The quick remedy is to stop and restart the Django container while the project is running. Afterward your terminal should show the successful connection. There are many ways to "fix" this[3], but it tends to resolve itself naturally as we add complexity to our Django project and it simply takes longer to start up.

Make initial migrations and superuser
Once the project is running, terminal will say that Django has unapplied migrations. Open a new terminal window (while the project is running) and launch the Django container's command line interface. (Note: make sure to replace the container name appropriately.)
% docker exec -it new_app_django sh
When the shell loads, run migrations:
# python manage.py migrate
Then complete the createsuperuser prompt:
# python manage.py createsuperuser
In your web browser, navigate to http://127.0.0.1:8000/admin/ and login to the Django admin with the newly-created user credentials.
Make a new secret key
Django generates a SECRET_KEY at the start of a new project.
# SECURITY WARNING: keep the secret key used in production secret!
SECRET_KEY = 'django-insecure-_$4tdx(mg_rbyi0(3o0tp#zlm+ip2^6l9y*%@dt1)r=i3vta%e'
Let's replace this with a new value (because the 'insecure' text, though unimportant, doesn't look very nice!) and then store it in .env so that sensitive values are not hard-coded.
To make a new key, open the Python shell in the Django container and import the Django function to make new keys:
>>> from django.core.management.utils import get_random_secret_key
>>> get_random_secret_key()
You will get a new string that looks something like:
'#lz)k&&zc@le*^mp245%mgh(9w-z=tsp5kgxmgju&t3k6-#o2t'
Add that to .env, making sure to remove any quotation marks at each end of the generated string:
COMPOSE_PROJECT_NAME=new_app
SECRET_KEY=#lz)k&&zc@le*^mp245%mgh(9w-z=tsp5kgxmgju&t3k6-#o2t
Replace the hard-coded value in settings.py. (You'll need to import the os package to reference the enviroment variable.)
import os
…
SECRET_KEY = os.environ.get('SECRET_KEY', '')
Add basic static configuration
In settings.py add a STATIC_ROOT variable. The Cloud Run build process needs this to be declared.
STATIC_URL = 'static/'
STATIC_ROOT = os.path.join(BASE_DIR, 'static')
Configure Google Cloud
Disclaimer: Everything up till this point has dealt with local code and configurations (with the exception of the behind-the-scenes pulling of images from Docker Hub.) We're now going to start the process of connecting our local project to a hosting service, and in my opinion, this is where things can become more mentally taxing. We will have to frequently switch back and forth between local and remote issues, and keep many values and considerations in our head. Stay the course and know that this is a learning opportunity.
Create a Google Cloud account, or if you already have one, navigate to your project selector page. Create a new project for your to-be-deployed Django app.

Enable billing on your account if you haven't already. (Note: Google Cloud has a fairly generous free trial period.)
Enable the following APIs with this handy link:
- Cloud Run
- Cloud SQL
- Cloud Build
- Secret Manager
- Compute Engine
To manage your Google Cloud project, you can often point and click through the various pages and tools in the browser-based console/dashboard. (Like we did in the above "New Project" step.)
You will also need to be able to manage your project via the terminal. To do this download and install the Google Cloud CLI. Then initialize it by typing the following and completing the prompt:
gcloud init
Configure production database
After your Google Cloud credentials have been authenticated and your project selected, via the CLI, create a production Postgres instance. Make sure to replace the bold values with your own:
gcloud sql instances create dockerized-django-instance \
    --project dockerized-django \
    --database-version POSTGRES_13 \
    --tier db-f1-micro \
    --region us-central1
- SQL instance name
- project id
- region (See Google Cloud's list of regions[4] and use the value for the one geographically closest to you.)
This process will take several minutes to complete.
Creating Cloud SQL instance for POSTGRES_13...⠼
After, create the database within the new SQL instance. Update the bold values with your own.
gcloud sql databases create dockerized-django-db \
    --instance dockerized-django-instance
- database name
- instance name
Create a database user and make sure to save the credentials somewhere.
gcloud sql users create DATABASE_USERNAME \
    --instance dockerized-django-instance \
    --password DATABASE_PASSWORD
The production database is now created. It's visible in the SQL tab of the Google Cloud console.

Link the database to your Dockerized project
During local development, Django will connect to the local Postgres database by default. You can also connect the local project to the production database and work with production data when appropriate.
This is accomplished through Google's Cloud SQL Auth proxy, which establishes an authenticated connection between your local app and its production SQL instance.
There's a particularly handy proxy client maintained by Google[5] in the form of a Docker image. This image creates a new container in your Docker project and facilitates the transfer of data between local and production. It feels like having another container.
Before adding the proxy image to Docker, we need two values to help to authenticate the project:
- The production database's instance connection name
- A credentials JSON file from Google
The instance connection name can be found onthe project's SQL instances page in the Google Cloud console. Look for the tab that says Instance connection name.

Add that value to the .env file with the key of CLOUD_INSTANCE_CONNECTION_NAME:
COMPOSE_PROJECT_NAME=new_app
SECRET_KEY=#lz)k&&zc@le*^mp245%mgh(9w-z=tsp5kgxmgju&t3k6-#o2t
CLOUD_INSTANCE_CONNECTION_NAME=dockerized-django:us-central1:dockerized-django-instance
We now need to create a special permission on the Google side to allow the local Docker project to connect to the production instance. Google manages these permissions through what it calls "service accounts."
In the Google console, navigate to IAM & Admin > Service Accounts. (You can also type "service accounts" in the search box.)
Click the button to create a new service account.

Fill out the fields with values that make the account's permissions easy to understand at a glance:
- Service account name:
local-dev-docker - Service account ID:
local-dev-docker - Service account description:
Allow Cloud SQL proxy access to local dev Docker image
Click through to create the account, and then grant it the role of Cloud SQL Admin.

You should see the new permission in your service account management page. Select it and navigate to the "keys" tab. Click the button to "ADD KEY" and "Create new key." Follow the steps to save the JSON file to your project directory as gcloud_sql_credentials.JSON.

Add the Cloud SQL proxy service to the Docker project and reference the new values. Update docker-compose.yaml with:
version: "3.8"
services:
  django:
    build: .
    container_name: new_app_django
    env_file:
      - ./.env
    command: python manage.py runserver 0.0.0.0:8000
    volumes:
      - .:/usr/src/new_app
    ports:
      - "8000:8000"
    depends_on:
      - pgdb
  pgdb:
    image: postgres:13.3
    container_name: new_app_pgdb
    environment:
      - POSTGRES_DB=postgres
      - POSTGRES_USER=postgres
      - POSTGRES_PASSWORD=postgres
    volumes:
      - ./pgdata:/var/lib/postgresql/data
  cloudsqlproxy:
      container_name: new_app_cloudsql_proxy
      image: gcr.io/cloudsql-docker/gce-proxy:latest
      volumes:
        - ./gcloud_sql_credentials.json:/secrets/cloudsql/gcloud_sql_credentials.json
      ports:
        - 5432:5432
      command: /cloud_sql_proxy --dir=/cloudsql -instances=${CLOUD_INSTANCE_CONNECTION_NAME}=tcp:0.0.0.0:5432 -credential_file=/secrets/cloudsql/gcloud_sql_credentials.json
volumes:
  pgdata:
Incantations
image: gcr.io/cloudsql-docker/gce-proxy:latestis a web address of a downloadable image of Google's Cloud SQL proxy.volumes:copies the local service account key to the container.command: /cloud_sql_proxy -instances=…is the shell command to run the proxy and reference theCLOUD_INSTANCE_CONNECTION_NAMEenvironment variable, and the downloaded service account key.
Start the project again and look for a successful message from the new proxy service.
% docker-compose up
new_app_cloudsql_proxy | 2023/02/21 14:13:15 Listening on 0.0.0.0:5432 for dockerized-django:us-central1:dockerized-django-instance
new_app_cloudsql_proxy | 2023/02/21 14:13:15 Ready for new connections
🕺
Connect Django to the auth proxy
The Docker project now has two database containers and one Django container. The Django project is configured to connect to the local Postgres instance, but not to the Cloud SQL proxy. Let's do that.
To easily switch between the two, create new environment variables in .env using the instance's credentials:
COMPOSE_PROJECT_NAME=new_app
SECRET_KEY=#lz)k&&zc@le*^mp245%mgh(9w-z=tsp5kgxmgju&t3k6-#o2t

USE_CLOUD_PROXY=true
CLOUD_PROXY_DB=dockerized-django-db # Use your own db.
CLOUD_PROXY_USER=YOUR_PROD_DB_USERNAME
CLOUD_PROXY_PASSWORD=YOUR_PROD_DB_PASSWORD
CLOUD_INSTANCE_CONNECTION_NAME=dockerized-django:us-central1:dockerized-django-instance
Open Django's settings.py and return to the databases section. It should currently be:
# Local, Postgres DB.
DATABASES = {
    'default': {
        'ENGINE': 'django.db.backends.postgresql',
        'NAME': 'postgres',
        'USER': 'postgres',
        'PASSWORD': 'postgres',
        'HOST': 'pgdb',
        'PORT': 5432,
    }
}
Change this to connect to the proxy if the USE_CLOUD_PROXY environment variable is set to true.
if os.environ.get('USE_CLOUD_PROXY', False) == 'true':
    print('Connecting to Google Cloud SQL proxy…')
    DATABASES = {
        'default': {
            'ENGINE': 'django.db.backends.postgresql',
            'NAME': os.environ.get('CLOUD_PROXY_DB', ''),
            'USER': os.environ.get('CLOUD_PROXY_USER', ''),
            'PASSWORD': os.environ.get('CLOUD_PROXY_PASSWORD', ''),
            'HOST': 'new_app_cloudsql_proxy',
            'PORT': 5432,
        }
    }
else:
    DATABASES = {
        'default': {
            'ENGINE': 'django.db.backends.postgresql',
            'NAME': 'postgres',
            'USER': 'postgres',
            'PASSWORD': 'postgres',
            'HOST': 'pgdb',
            'PORT': 5432,
        }
    }
That should be fairly straightforward: If there's an environment variable called USE_CLOUD_PROXY whose value is true, then try to connect to the proxy container using the database's credentials. Otherwise use the existing Postgres container.
Run docker-compose up again to test. You should see a message from the Django container that it has connected and has unapplied migrations.
Haven't we already applied initial migrations?
Yes! But not for this database. You are now connecting to production. With the connection made, run through the same database setup steps that we did for the local database.
Open up the Django container shell:
% docker exec -it new_app_django sh
Run migrations (on production):
# python manage.py migrate
Create a superuser (on production):
# python manage.py createsuperuser
And just like that, the project is connected to its production database! 💃
A note about some potential errors when connecting to the proxy container:
Container still initializing
Like with the local DB, it's possible for the Django container to start before the proxy container has initialized. Once it's ready, you may need to toggle the Django container off/on while the project is running.
Cached environment variables
Docker caches all sorts of things, and it's possible that when you add new values to your .env file, or change your settings.py that you won't see the latest-and-greatest every time you run docker-compose up. If you suspect that, you can run docker-compose build again and you should force a cache refresh.
I sometimes get into the habbit of adding print statements to my settings.py file to output environment variables to the terminal when the project starts. Ex:
print('checking environment variable', os.environ.get('USE_CLOUD_PROXY', '')
Install Gunicorn
The development build of your Django project uses the built-in runserver command to start a local version of the site. Django's docs say to not use this command in production.[6]
Instead we'll add the Gunicorn package to serve as the production gateway between the web server and Python application. Add the package to requirements.txt:
django===4.1.5
psycopg2==2.9.3
gunicorn==20.1.0
Update Dockerfile to execute the Gunicorn command:
# pull official base image
FROM python:3.8.13-bullseye

# set work directory
WORKDIR /usr/src/your_app_root_folder

# set environment variables
ENV PYTHONUNBUFFERED=1

# install dependencies
RUN pip install --upgrade pip
COPY requirements.txt ./
RUN pip install -r requirements.txt

# copy project
COPY . .

# Run the web service on container startup.
CMD exec gunicorn --bind 0.0.0.0:$PORT --workers 1 --threads 8 --timeout 0 new_app.wsgi:application
Rebuild the application:
docker-compose build django
Restart the application:
docker-compose up
You might have noticed the PORT environment variable in the Gunicorn CMD line. This variable is defined in Google Cloud Run by default as 8080.[7]
An important thing to note is that this Gunicorn command is run in the production environment and not in local development. The production image is built and run from the Dockerfile. The local environment is run using the commands specified in docker-compose.yaml, which is still using runserver:8000.
Setup production environment variables with Secret Manager
To avoid hard-coding sensitive values (e.g., production database password), and to specify local development values (e.g., name of Docker project), local environment variables have been stored in .env.
The production environment will not have access to that file, nor would we want it to. The production environment has its own concerns and secrets, so it will need its own special file. Django will also need to be told how to get it and what to do with it.
Google Cloud has a "Secret Manager" tool that lets you store these kind of environment variables for your project, and manages access to them for your various services. Type "Secret Manager" into the console search box and click through to manage and create a new secret.
Give the secret the name django_settings and enter in the following key values, just like you would in the .env file:
GOOGLE_CLOUD_PROJECT=…SECRET_KEY=…DATABASE_HOST=…DATABASE_NAME=…DATABASE_USER=…DATABASE_PASSWORD=…
The DATABASE_HOST value is the path for the production web application to talk to its production database. The construction for this path within a Cloud Run project is /cloudsql/ + your database instance connection name. For example:
/cloudsql/dockerized-django:us-central1:dockerized-django-instance

Now the cloud project has a secret value store that can be accessed in production. The production instance of your Django project (which hasn't been deployed yet) will need to know how to access those values. Add to requirements.txt the Google Cloud secret manager package. (This package does what you think it will.)
django===4.1.5
psycopg2==2.9.3
gunicorn==20.1.0
google-cloud-secret-manager==2.12.0
Rebuild the container to get the new package:
% docker-compose build django
To settings.py add these imports toward the top of the file:
import os
from pathlib import Path
import google.auth
from google.cloud import secretmanager
Then import the payload from your authorized secret manager. (Google takes care of the authorization). (Make sure to remove any existing declarations of the variables DEBUG, ALLOWED_HOSTS and SECRET_KEY to avoid overwriting this code.)
#############################
### ENVIRONMENT VARIABLES ###
#############################
try:
    client = secretmanager.SecretManagerServiceClient()
    name = "projects/PROJECT-ID/secrets/django_settings/versions/latest"
    payload = client.access_secret_version(name=name).payload.data.decode("UTF-8")
    payload = payload.split('\n')
    ENVIRONMENT = 'prod'

    for p in payload: # Each line in payload looks like GOOGLE_CLOUD_PROJECT=my-project-id.
        if p.startswith('GOOGLE_CLOUD_PROJECT'):
            GOOGLE_CLOUD_PROJECT = p.split('=')[1]

        if p.startswith('DATABASE_HOST'):
            DATABASE_HOST = p.split('=')[1]

        if p.startswith('DATABASE_NAME'):
            DATABASE_NAME = p.split('=')[1]

        if p.startswith('DATABASE_USER'):
            DATABASE_USER = p.split('=')[1]

        if p.startswith('DATABASE_PASSWORD'):
            DATABASE_PASSWORD = p.split('=')[1]

        if p.startswith('SECRET_KEY'):
            result = ''
            for i, s in enumerate(p.split('=')):
                if i != 0:
                    result += s
            SECRET_KEY = result

    # Successfully loading secrets manager means production environment.

    DEBUG = False

except google.auth.exceptions.DefaultCredentialsError:
    ENVIRONMENT = 'dev'
    DEBUG = True
    ALLOWED_HOSTS = ['*']
    SECRET_KEY = os.environ.get('SECRET_KEY', '')
What the hell is going on here? 🤬
We're telling Django to try to retrieve a payload of secret key/values (called django_settings) from the project's secret manager so that they can be used in settings.py file. If the connection is successful, a payload is returned in the form of a single string. Something like:
GOOGLE_CLOUD_PROJECT=dockerized-django
SECRET_KEY=f&&s$#w6pc^bg#*va*…
DATABASE_HOST=/cloudsql/dockerized-django:us-central1:dockerized-django-instance
DATABASE_NAME=db_name
DATABASE_USER=db_user
DATABASE_PASSWORD=asdflk341=23kjdsf
It looks just like we declared in the secret manager form. Because the wall of text is a single string, we use Python to separate each line into new strings: payload.split(\n).
We then iterate over the new strings and split them again by the equal sign to determine the key and value of the secrets: p.split('=').
For example say that:
 p = 'DATABASE_NAME=db_name'

 p.split('=') # Would yield --> ['DATABASE_NAME', 'db_name']

 DATABASE_NAME = p.split('=')[1] # Therefore you can declare the variable like so.
I will be the first to admit that this method of decoding the payload doesn't look very efficient. There are packages out there that read and import environment variable files in a single line. (As seen in the Google Run documentation.[8])
I don't like that approach for my own projects because you cannot quickly see what variables been imported.
So I like my dumb approach, as it makes me declare each variable. It means having to add new declarations whenever the payload is updated, but I enjoy the visibility into what variables exist in the project.
One more note about the payload import:
You might notice that the import and declaration of the SECRET_KEY looks different than the other variables. That's to account for the fact that the generated key might have multiple equal signs in it — SECRET_KEY=#lzk&&zc=@le… — so simply splitting the whole string by one equal sign will not do the trick.
Tweak database connection for production
Right now settings.py is prepared for two database possibilities in the dev environment:
- Use a local Postgres database
- Connect to the Google Cloud proxy
There is one more scenario to configure for:
- Production environment connecting directly to production database
This is done by accessing the production database credentials declared in the secret manager. The service account for the production environment will be later authorized to access them, whereas our local environment is not.
If the app is able to retrieve the secrets, then the environment being run is production. I.e., EVIRONMENT = 'prod' if the secrets can be gathered and ENVIRONMENT = 'dev' if they can't. Adjust your DATABASES section of settings.py` like so:
if ENVIRONMENT == 'prod':
    # Production, Google CloudSQL DB.
    DATABASES = {
        'default': {
            'ENGINE': 'django.db.backends.postgresql',
            'NAME': DATABASE_NAME,
            'USER': DATABASE_USER,
            'PASSWORD': DATABASE_PASSWORD,
            'HOST': 'DATABASE_HOST',
        }
    }
else:
    if os.environ.get('USE_CLOUD_PROXY', False) == 'true':
        print('Connecting to Google Cloud SQL proxy…')
        DATABASES = {
            'default': {
                'ENGINE': 'django.db.backends.postgresql',
                'NAME': os.environ.get('CLOUD_PROXY_DB', ''),
                'USER': os.environ.get('CLOUD_PROXY_USER', ''),
                'PASSWORD': os.environ.get('CLOUD_PROXY_PASSWORD', ''),
                'HOST': 'new_app_cloudsql_proxy',
                'PORT': 5432,
            }
        }
    else:
        DATABASES = {
            'default': {
                'ENGINE': 'django.db.backends.postgresql',
                'NAME': 'postgres',
                'USER': 'postgres',
                'PASSWORD': 'postgres',
                'HOST': 'pgdb',
                'PORT': 5432,
            }
        }
Refactor
If you are uncomfortable with the amount of repetition in the database logic, you can refactor like so:
DATABASES = {
    'default': {
        'ENGINE': 'django.db.backends.postgresql'
    }
}
if ENVIRONMENT == 'prod':
    # Production, Google CloudSQL DB.
    DATABASES['default']['NAME'] = DATABASE_NAME
    DATABASES['default']['USER'] = DATABASE_USER
    DATABASES['default']['PASSWORD'] = DATABASE_PASSWORD
    DATABASES['default']['HOST'] = DATABASE_HOST
else:
    DATABASES['default']['PORT'] = 5432
    if os.environ.get('USE_CLOUD_PROXY', False) == 'true':
        # Local, Google CloudSQL Proxy DB.
        print('Connect to DB: GOOGLE CLOUD PROXY')
        DATABASES['default']['NAME'] = os.environ.get('CLOUD_PROXY_DB', '')
        DATABASES['default']['USER'] = os.environ.get('CLOUD_PROXY_USER', '')
        DATABASES['default']['PASSWORD'] = os.environ.get('CLOUD_PROXY_PASSWORD', '')
        DATABASES['default']['HOST'] = 'new_app_cloudsql_proxy'
    else:
        # Local, Postgres DB.
        print('Connect to DB: LOCAL POSTGRES')
        DATABASES['default']['NAME'] = 'postgres'
        DATABASES['default']['USER'] = 'postgres'
        DATABASES['default']['PASSWORD'] = 'postgres'
        DATABASES['default']['HOST'] = 'pgdb'
Deploy
Can we launch this thing already?
Yes. We can finally launch this this thing.
Create a new file in the root directory called cloudmigrate.sql and copy the following configurations. Make sure to replace the bold values at the bottom with your own.
# Copyright 2020 Google LLC
#
# Licensed under the Apache License, Version 2.0 (the "License");
# you may not use this file except in compliance with the License.
# You may obtain a copy of the License at
#
#      http://www.apache.org/licenses/LICENSE-2.0
#
# Unless required by applicable law or agreed to in writing, software
# distributed under the License is distributed on an "AS IS" BASIS,
# WITHOUT WARRANTIES OR CONDITIONS OF ANY KIND, either express or implied.
# See the License for the specific language governing permissions and
# limitations under the License.
# [START cloudrun_django_cloudmigrate]
steps:
  - id: "build image"
    name: "gcr.io/cloud-builders/docker"
    args: ["build", "-t", "gcr.io/${PROJECT_ID}/${_SERVICE_NAME}", "."]
  - id: "push image"
    name: "gcr.io/cloud-builders/docker"
    args: ["push", "gcr.io/${PROJECT_ID}/${_SERVICE_NAME}"]
  - id: "apply migrations"
    name: "gcr.io/google-appengine/exec-wrapper"
    args:
      [
        "-i",
        "gcr.io/$PROJECT_ID/${_SERVICE_NAME}",
        "-s",
        "${PROJECT_ID}:${_REGION}:${_INSTANCE_NAME}",
        "-e",
        "SETTINGS_NAME=${_SECRET_SETTINGS_NAME}",
        "--",
        "python",
        "manage.py",
        "migrate",
      ]
  - id: "collect static"
    name: "gcr.io/google-appengine/exec-wrapper"
    args:
      [
        "-i",
        "gcr.io/$PROJECT_ID/${_SERVICE_NAME}",
        "-s",
        "${PROJECT_ID}:${_REGION}:${_INSTANCE_NAME}",
        "-e",
        "SETTINGS_NAME=${_SECRET_SETTINGS_NAME}",
        "--",
        "python",
        "manage.py",
        "collectstatic",
        "--verbosity",
        "2",
        "--no-input",
      ]
substitutions:
  _INSTANCE_NAME: dockerized-django-instance
  _REGION: us-central1
  _SERVICE_NAME: dockerized-django-service
  _SECRET_SETTINGS_NAME: django_settings
images:
  - "gcr.io/${PROJECT_ID}/${_SERVICE_NAME}"
# [END cloudrun_django_cloudmigrate]
These configurations come from Google's Cloud Run documentation, and it's the one step of this guide where I'll advocate a wholesale copy-paste job. As to what these configurations do:
The
cloudmigrate.yamlfile performs not only the typical image build steps (creating the container image and pushing that to the container registry), but also the Djangomigrateandcollectstaticcommands. These require access to the database, which is performed by using the app-engine-exec-wrapper, a helper for Cloud SQL Auth proxy.[9]
1. Build the image and upload to cloud registry
In your terminal:
gcloud builds submit --config cloudmigrate.yaml \
    --substitutions _INSTANCE_NAME=dockerized-django-instance,_REGION=us-central1
Cloud Run will now create and upload your image. Then it runs the migrate and collectstatic steps specified in cloudmigrate.sql.
This is exciting! It's happening!
But before the build finishes, you should see it stopped by a breaking error:
Step #2 - "apply migrations": googleapi: Error 403: The client is not authorized to make this request…
ERROR
🤬😡🤬😡
I've intentionally walked you into this problem to demonstrate how Google Cloud's service accounts work. The build phase of deployment gets its own service account called cloud build, and the error we're seeing in this deployment is that the build account doesn't have access to CloudSQL (our database), and therefore it is failing when it tries to apply migrations.
Earlier in the guide we created a service account for our local environment (local-dev-docker) and granted it access roles of Cloud SQL Admin and Secret Manager Secret Accessor.
We need to do the same thing for the Cloud Build Service Account.
In the Google console, navigate back to IAM & Admin tab, and either create or edit a new principal account. The principal field should be your project's unique number (you should see examples in existing principal accounts) followed by @cloudbuild.gserviceaccount.com.

Grant these roles to the cloud build account:
Cloud Build Service Account(if not already declared)Cloud SQL Admin
Rebuild the image (same command as before):
gcloud builds submit --config cloudmigrate.yaml \
    --substitutions _INSTANCE_NAME=dockerized-django-instance,_REGION=us-central1
…and this time…it worked! You can view your uploaded image in the console's Container Registry.

2. Make initial deployment
After the image has been created and uploaded, it needs to be deployed:
gcloud run deploy dockerized-django-service \
    --platform managed \
    --region us-central1 \
    --image gcr.io/dockerized-django/dockerized-django-service \
    --add-cloudsql-instances dockerized-django:us-central1:dockerized-django-instance \
    --allow-unauthenticated
This should take a few minutes. After you'll get something like:
Deploying container to Cloud Run service [dockerized-django-service] in project [dockerized-django] region [us-central1]
✓ Deploying new service... Done.
✓ Creating Revision... Creating Service.
✓ Routing traffic...
✓ Setting IAM Policy...
Done.
Service [dockerized-django-service] revision [dockerized-django-service-00001-tad] has been deployed and is serving 100 percent of traffic.
Service URL: https://dockerized-django-service-j4plf2ebva-uc.a.run.app
It's deployed! 🎉
The uploaded image has built and is now accessible on the internet at the described Service URL. If you plug that URL into your browser, it will take you to the live website. Remember, we haven't actually made any views or templates, so the only page that's accessible by default on a production Django website would be the admin. Let's check out what that looks like by appending /admin/ to the new Service URL.
Note the required trailing backslash / after admin.
https://dockerized-django-service-j4plf2ebva-uc.a.run.app/admin/

Another (intentional) error! Service Unavailable. But the service is running, or at least it tried to run. To inspect this issue, we can look at the logs in the Cloud Run tab of the Google console. Select it from the sidebar and select your running service.

Once you select your service you should see a list of error logs, and toward the top, one should read:
PermissionDenied: 403 Permission 'secretmanager.versions.access' denied for resource…
This should be a familiar-looking error. The service account that actually runs the website — that's the Compute Engine service account — does not have access to the secrets manager.
To fix this, return to the Service Accounts page and add the Secret Manager Secret Accessor role to the Compute Engine service account.
While we are here, I will save you the step of debugging a future error: We also need to give the compute engine access to the Cloud SQL Client role.

Now re-deloy the site (same command as before):
gcloud run deploy dockerized-django-service \
    --platform managed \
    --region us-central1 \
    --image gcr.io/dockerized-django/dockerized-django-service \
    --add-cloudsql-instances dockerized-django:us-central1:dockerized-django-instance \
    --allow-unauthenticated
Once the deployment is complete, return to the live admin page:
https://dockerized-django-service-j4plf2ebva-uc.a.run.app/admin/
You should now see a 400 error. This is because the ALLOWED_HOSTS value has not been configured for production. To fix this add the new service URL to our secret manager and account for it in settings.py.
Via the Google Console, return to the secret manager and update your existing django_settings secrets to include a new key/value pair: CLOUDRUN_SERVICE_URL=your-service-url-here.app.

And to your payload import in settings.py add:
ENVIRONMENT = 'prod'
for p in payload: # Each line in payload looks like GOOGLE_CLOUD_PROJECT=my-project-id.
    if p.startswith('GOOGLE_CLOUD_PROJECT'):
        GOOGLE_CLOUD_PROJECT = p.split('=')[1]

    if p.startswith('DATABASE_HOST'):
        DATABASE_HOST = p.split('=')[1]

    if p.startswith('DATABASE_NAME'):
        DATABASE_NAME = p.split('=')[1]

    if p.startswith('DATABASE_USER'):
        DATABASE_USER = p.split('=')[1]

    if p.startswith('DATABASE_PASSWORD'):
        DATABASE_PASSWORD = p.split('=')[1]

    if p.startswith('CLOUDRUN_SERVICE_URL'):
        CLOUDRUN_SERVICE_URL = p.split('=')[1]

    if p.startswith('SECRET_KEY'):
        result = ''
        for i, s in enumerate(p.split('=')):
            if i != 0:
                result += s
        SECRET_KEY = result

# Successfully loading secrets manager means production environment.
DEBUG = False

if CLOUDRUN_SERVICE_URL:
    ALLOWED_HOSTS = [CLOUDRUN_SERVICE_URL]
    CSRF_TRUSTED_ORIGINS = ['https://' + CLOUDRUN_SERVICE_URL]
    SECURE_SSL_REDIRECT = True
    SECURE_PROXY_SSL_HEADER = ("HTTP_X_FORWARDED_PROTO", "https")
You will now need to rebuild the entire image before you redeploy it. That wasn't necessary before the previous redeployment because the code hadn't changed. Now it has.
Rebuild and upload the image (same as before):
gcloud builds submit --config cloudmigrate.yaml \
    --substitutions _INSTANCE_NAME=dockerized-django-instance,_REGION=us-central1
Re-deploy (same as before):
gcloud run deploy dockerized-django-service \
    --platform managed \
    --region us-central1 \
    --image gcr.io/dockerized-django/dockerized-django-service \
    --add-cloudsql-instances dockerized-django:us-central1:dockerized-django-instance \
    --allow-unauthenticated
Now return to the admin page…

Heck yes! 🤙 That's the admin login alright. (Even if it appears to have no styling.) Let's try logging in with the admin credential that was created during the previous createsuperuser proxy connection.

…that is a successful login! It looks ugly because the site's static files haven't been added, but we are logged in all the same!
We should take a moment to appreciate all that's happened here: We've created a Django project using Docker containers; deployed it; it actually runs; we can connect to our live database locally; and login with those credentials on a production environment.
3. Add static files
Let's improve the look of the site by adding its static files. The Google documentation shows a handy example of how to use the django-storages[10] Python package to link a project to a Google Cloud Bucket. The package manages the static settings for you in production.
The package requires a storage bucket for the static files to live. In Google console, navigate to the "Cloud Storage" tab and create a new bucket. I call mine project-name-media.

When you are prompted to select the bucket's access control, choose the Fine-grained option.

Add the media bucket's name to the secret manager payload, preceeded by the key GS_BUCKET_NAME. The django-storages package looks for this value automatically. Your django-settings secrets should now look something like:
GOOGLE_CLOUD_PROJECT=dockerized-django
SECRET_KEY=f&&s$#w6pc^bg#*va*8ku^9y=m244e59bn&-ug6mouj75j7cwq
CLOUDRUN_SERVICE_URL=dockerized-django-service-j4plf2ebva-uc.a.run.app
GS_BUCKET_NAME=dockerized-django-media
…
Update settings.py to account for the new variable in the payload import:
for p in payload: # Each line in payload looks like GOOGLE_CLOUD_PROJECT=my-project-id.
    if p.startswith('GOOGLE_CLOUD_PROJECT'):
        GOOGLE_CLOUD_PROJECT = p.split('=')[1]

    if p.startswith('GS_BUCKET_NAME'):
        GS_BUCKET_NAME = p.split('=')[1]
    …
Add one more django-storages configuation to the static section of settings.py:
STATIC_URL = 'static/'
STATIC_ROOT = os.path.join(BASE_DIR, 'static')
if ENVIRONMENT == 'prod':
    DEFAULT_FILE_STORAGE = "storages.backends.gcloud.GoogleCloudStorage"
    STATICFILES_STORAGE = "storages.backends.gcloud.GoogleCloudStorage"
    GS_DEFAULT_ACL = "publicRead"
Update requirements.txt to include django-storages:
django===4.1.5
psycopg2==2.9.3
gunicorn==20.1.0
google-cloud-secret-manager==2.12.0
django-storages[google]==1.13
Rebuild the local container since there is a new package:
% docker-compose build django
Then rebuild and upload the image to Google Cloud:
gcloud builds submit --config cloudmigrate.yaml \
    --substitutions _INSTANCE_NAME=dockerized-django-instance,_REGION=us-central1
Redeploy:
gcloud run deploy dockerized-django-service \
    --platform managed \
    --region us-central1 \
    --image gcr.io/dockerized-django/dockerized-django-service
The moment of truth: refresh your production admin page:

Hey, hey, hey! That was a mostly painless way to get your static files to production.
Conclusion
Now that your site is running, you can extend your Django project with new views and pages. Whether this was your first Django deployment, or you're an old pro, I hope that this essay helped you to better understand some part of the process of dockerizing and deploying Django. At a minimum, perhaps you can read through official documentation with more confidence, knowing a bit more about what the various incantations actually do.
And for those that followed along step-by-step, please forgive me for intentionally walking you into bugs in the final steps. Teach a man to fish! 🎣
References:
- [1]Docker's compose file version 3
- [2]Docker Hub's official Postgres image re: required environment variables
- [3]How to make Django container to wait for ready Postgres port
- [4]Google Cloud Regions
- [5]Google Cloud SQL Auth proxy repository
- [6]Django
runserverdocumentation - [7]Cloud Run default
PORTvalue - [8]Example of importing environment variables in one line
- [9]Understanding the
cloudmigratedocumentation - [10]
django-storagesPython package